When watching movies, streaming shows, or giving presentations with your projector, have you ever noticed:
· Blurry or soft images
· Text that’s hard to read
· Out-of-focus edges
· Washed-out or unclear visuals
Many people immediately think:“Is my projector broken? Do I need a new one?”
The good news is — in most cases, a blurry projector image is not a hardware issue.
It’s usually caused by incorrect placement, focus settings, projection distance, or display adjustments. With a few simple tweaks, you can dramatically improve image clarity in just minutes.
Follow these 4 easy steps to make your projector sharp and clear again.
Improper placement is one of the most common reasons for a blurry or distorted image.
If the projector is tilted or placed at an angle, you may notice:
· Trapezoid (keystone) distortion
· Blurry edges
· Uneven focus across the screen
· Difficulty getting the whole image sharp
· Place the projector on a stable, flat surface or stand
· Keep the lens facing the wall or screen directly
· Avoid side projection or steep angles
?Tip:
Physical alignment is better than digital correction.
Too much keystone correction reduces resolution and makes the image softer.
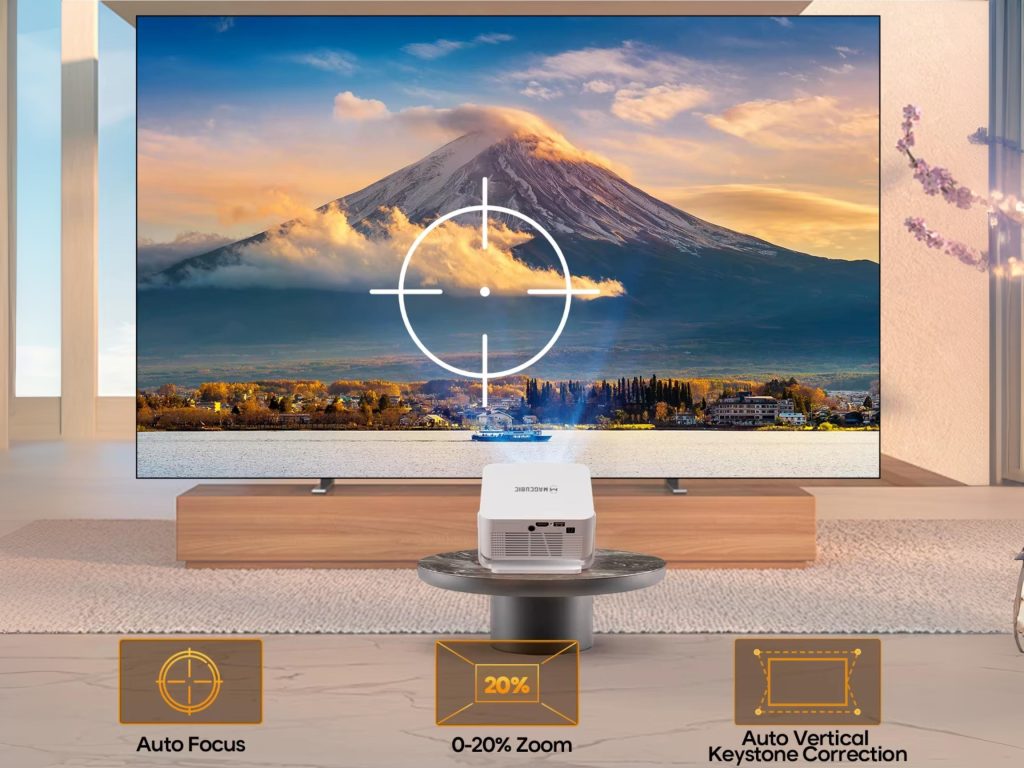
If the entire screen looks soft or fuzzy, your projector likely just needs proper focusing.
1. Press the Electronic Focus button on the remote
2. Slowly adjust the focus
3. Look at subtitles or small text
4. Stop when edges look crisp and sharp
Using text or menu icons helps you judge sharpness more accurately.
Many Magcubic projectors feature fast electronic focus, making adjustments smooth and precise, so even beginners can quickly find the perfect clarity.
?Always refocus after moving the projector.
A common misconception is:Bigger screen = better experience
But in reality:Too far = stretched pixels = blurrier image
When you exceed the optimal throw distance, even a 1080P projector can look soft.
You may notice:
· Blurry text
· Less sharp edges
· Visible grain
· Lower brightness
This is one of the biggest reasons people feel their projector “gets less clear” when moved farther away.
For home use, try this simple reference:
· 4 ft (1.2 m) → 60–70 inches (sharpest)
· 6 ft (1.8 m) → 80–100 inches (best balance ⭐ recommended)
· 8 ft (2.4 m) → 100–120 inches (more immersive)
Around 5.5 ft (1.68 m) offers the best balance between clarity and screen size.
At this distance:
· Higher pixel density
· Brighter image
· Sharper details
· More comfortable viewing
Prioritize clarity first, then screen size.
Magcubic home projectors typically deliver crisp and bright images within the 1.5–2 meter range, ideal for bedrooms and living rooms.
If your image looks gray, washed out, or lacking detail, brightness and contrast settings may need adjustment.
Settings → Projection Settings → Display Settings
Adjust:
· Brightness
· Contrast
· Sharpness
· Picture mode
· Night viewing → lower brightness + higher contrast
· Daytime use → increase brightness
· Movie mode → natural colors
· Bright mode → presentations/office use
Proper settings can significantly enhance clarity and visual quality.
If your projector image looks blurry, check:
✔ Is the projector facing the screen directly?
✔ Refocus the projector
✔ Stay within the recommended distance
✔ Adjust brightness and contrast
✔ Clean the lens surface
Over 80% of issues can be solved with these simple steps.
A blurry projector image usually isn’t a device problem — it’s simply a setup issue.By:
· Proper positioning
· Accurate focusing
· Correct distance
· Optimized settings
You can easily enjoy a sharp, cinema-quality image at home.
If you want a more hassle-free experience, consider a smart projector with electronic focus and automatic adjustments. It saves time and ensures great image quality every time you power on.
This is usually caused by angled placement or excessive keystone correction.
Try physically aligning the projector instead of relying on digital correction.
No.Projecting from too far reduces pixel density and sharpness. Stay within the recommended distance for best results.
Both work well, but electronic focus is faster and more precise, especially for everyday home use.
Most likely brightness.
Close curtains, increase brightness, use an ALR screen, or choose a higher-lumen projector.


 United States Dollar ($)